Solinst Levelogger Water Level Dataloggers
Artesian Well Fitting Assembly
Tools and Materials Needed
- Model 3001 Artesian Well Fitting Assembly (#112350)
- Sealed well cap (with smooth top cap)
- Drill with 1" and 1/2" Drill Bits
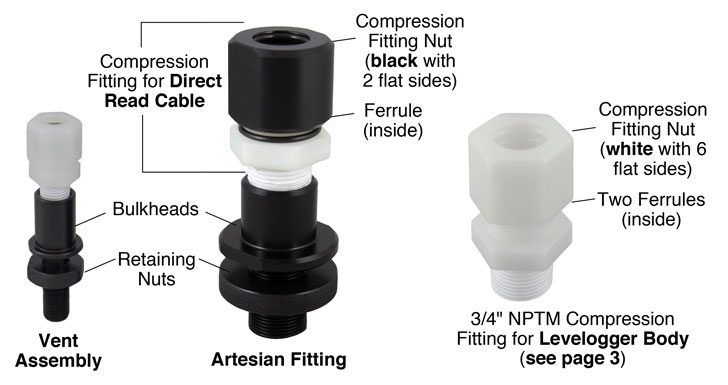
Note:
The Artesian Well Fitting Assembly for the Direct Read Cable, or Levelogger installation, is not recommended for pressures in excess of 30 psi (66 ft. (20 m)) of water column.
The standard Solinst Model 3001 Well Cap Assembly is not designed for artesian well monitoring.
Instructions for Use with a Direct Read Cable
Note:
See below for installation without the use of a Direct Read Cable. The Levelogger will be installed in the fitting at the top of the well; ideal for continuous artesian conditions.
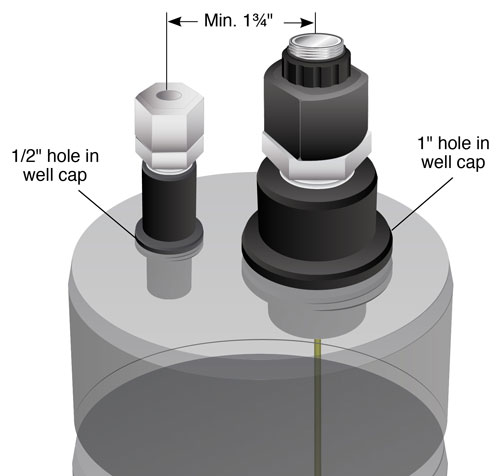
Model 3001 Artesian Well Fitting Assembly Installed with a Direct Read Cable on the top of a Sealed Well Cap
Prepare the Well Cap
Drill two holes in your well cap to accommodate the bulkhead fittings – a 1/2" diameter hole for the vent assembly and a 1" hole for the artesian fitting. Ensure you leave enough room between the holes for installing both (see diagram above).
Install the Artesian Fitting Assembly
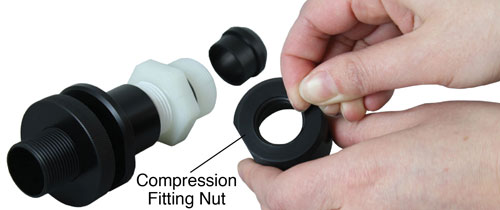
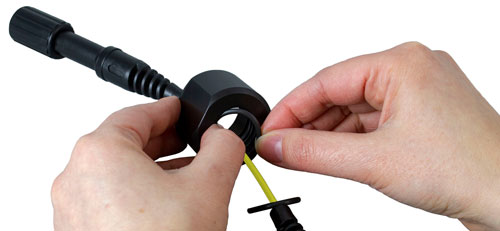
- Unscrew the compression fitting nut from the fitting and carefully remove the two o-rings from the inside of the nut.
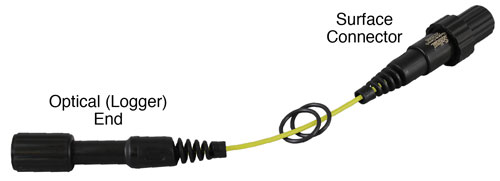
- Thread the two o-rings over the optical (logger) end of your Direct Read Cable.
- Thread the compression fitting nut over the optical end of the Direct Read Cable (the end with two o-ring grooves first).
- Install the two o-rings back into the two grooves in the top of the compression fitting nut.
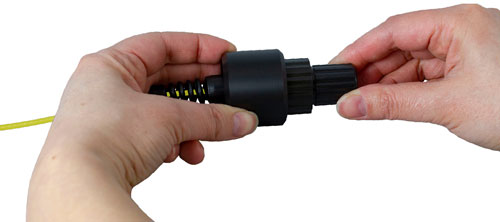
- Push the compression fitting nut up until it seats snuggly against the surface connector of the Direct Read Cable.
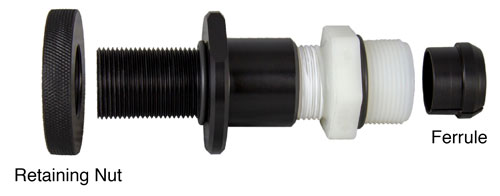
- Unthread the retaining nut from the bulkhead assembly.
- Use the split to slide the ferrule onto the Direct Read Cable.
- Slide the bulkhead assembly over the optical end of the Direct Read Cable (the compression fitting end first). This will take some force.
- Insert the ferrule and tighten the bulkhead assembly into the compression fitting nut.
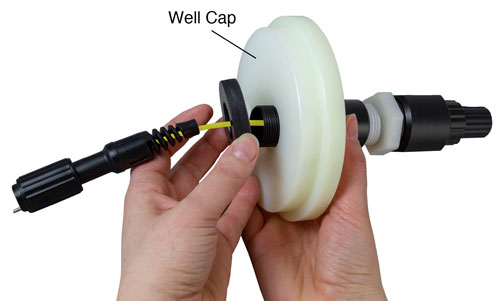
- Thread the optical end of the Direct Read Cable through the 1" hole in the well cap until the artesian fitting reaches the top of the well cap.
- Thread the retaining nut over the optical end of the Direct Read Cable and screw it onto the bottom of the artesian fitting. Tighten to ensure the o-ring on the bulkhead is snug, creating a seal with the smooth top of the well cap.
- Remove the retaining nut from the bulkhead on the vent assembly. Insert the bulkhead through the 1/2" hole in the wellhead. Secure the vent assembly to the top of the wellhead using the retaining nut. Tighten to ensure the o-ring on the bulkhead is snug, creating a seal with the well cap.
- Connect your Levelogger to the optical end of the Direct Read Cable.
- Lower the Levelogger down-well, and install the well cap. See page 1 for a diagram of the completed installation.



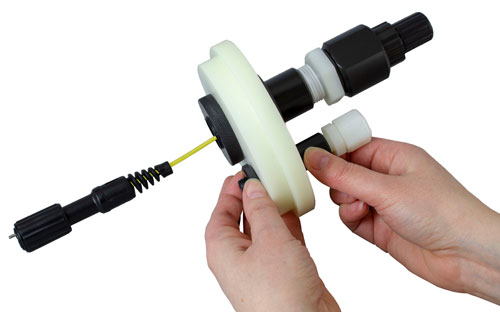
Instructions for Installing Directly to Levelogger
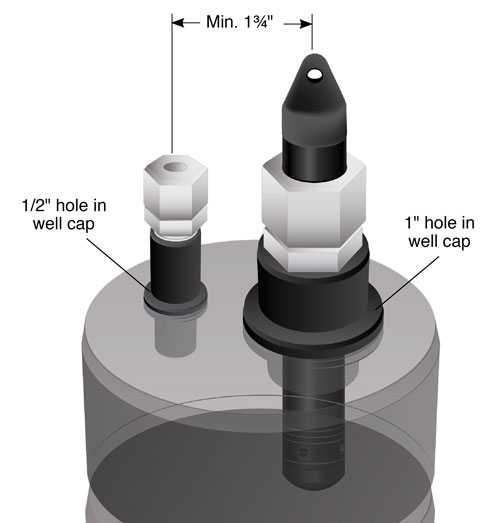
Model 3001 Artesian Well Fitting Assembly Installed with a Levelogger on the top of a Sealed Well Cap
Prepare the Well Cap
Start by drilling two holes in your well cap to accommodate the bulkhead fittings – a 1/2" diameter hole for the vent assembly and a 1" hole for the artesian fitting. Ensure you leave enough room between the holes for installing both (see diagram above).
Install the Artesian Fitting Assembly
- Unscrew and remove the compression fitting (with black nut and ferrule) used for Direct Read Cables from the artesian fitting bulkhead. You will use the compression fitting for the Levelogger body in its place.
- Unscrew the retaining nut from the artesian fitting bulkhead. Insert the bulkhead through the 1" hole in the well cap. Secure the bulkhead to the top of the well cap using the retaining nut. Tighten to ensure the o-ring on the bulkhead is snug, creating a seal between the smooth top of the well cap and bulkhead.
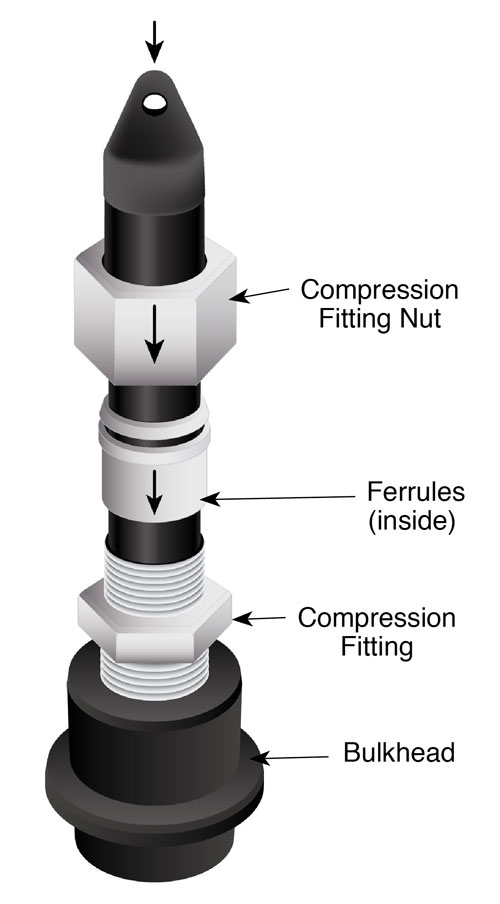
- Thread the compression fitting for the Levelogger body into the bulkhead. Loosen the compression fitting nut (compression fitting shown above is for reference, you may not need to completely remove the compression fitting nut).
- Slide the Levelogger into the compression fitting, leaving about 1/4 of the Levelogger body exposed above the fitting.
- Tighten the compression fitting nut around the Levelogger (about 1-1/4 turns past finger tight).
- Remove the retaining nut from the bulkhead on the vent assembly. Insert the bulkhead through the 1/2" hole in the wellhead. Secure the vent assembly to the top of the wellhead using the retaining nut. Tighten to ensure the o-ring on the bulkhead is snug, creating a seal between the well cap and bulkhead.
- Install the well cap, with connected artesian well fitting assembly, onto the well.


