To calibrate a connected Levelogger 5 LTC or LTC Levelogger Edge conductivity sensor, select Conductivity Calibration from the Navigation Menu or Conductivity Cal. from the options on the Dataloggers Screen.
The LTC Levelogger must not be running while the calibration is being performed. See Section 6.8 for information on stopping dataloggers.
Note:
See the Levelogger User Guide for more information on conductivity calibration requirements and guidance.
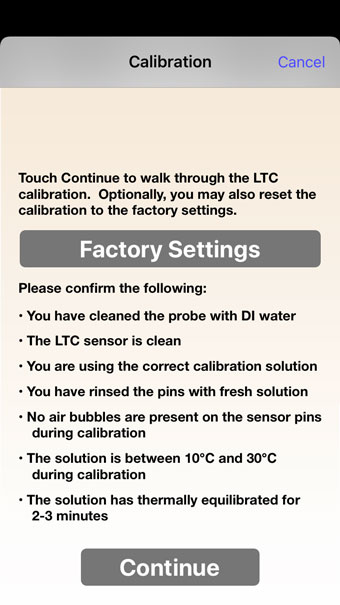
Figure 12-1 Conductivity Calibration Introduction - iOS
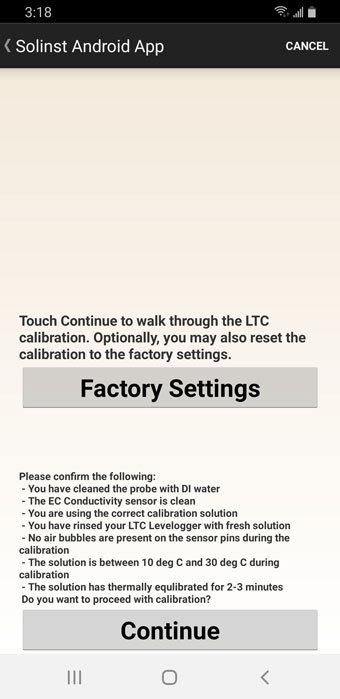
Figure 12-2 Conductivity Calibration Introduction - Android
A Levelogger LTC can be set back to original factory calibration settings for conductivity at any time, by selecting Factory Settings in the first Calibration screen. If you suspect that user calibrations are not working properly, you can restore the Levelogger LTC to its original factory settings and then perform a "first-time" conductivity user calibration to maximize accuracy.
To initiate a calibration, select "Continue" after you have read through the requirements on the screen.
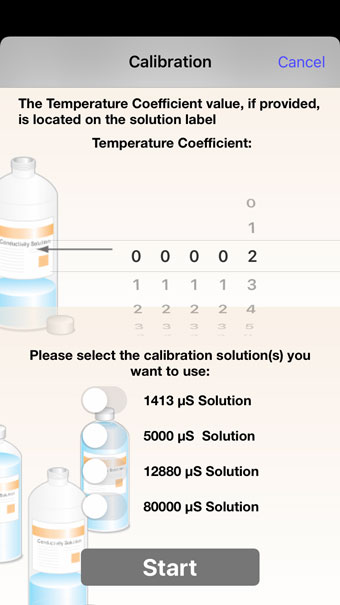
Figure 12-3 Temperature Coefficient and Calibration Solutions - iOS
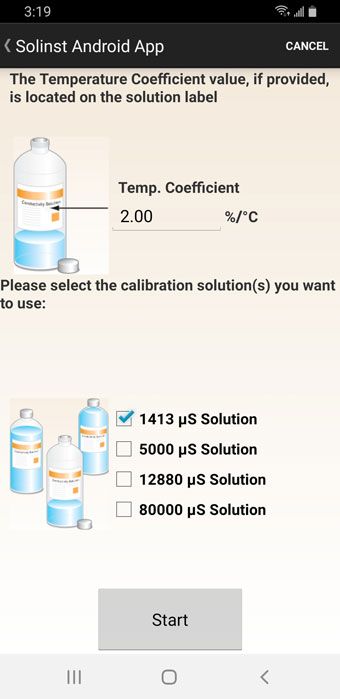
Figure 12-4 Temperature Coefficient and Calibration Solutions - Android
Select the Temperature Coefficient for the conductivity solution(s) you will be using. The default setting is 2.000. If the conductivity solution you are using to calibrate the LTC Levelogger states a different temperature coefficient on the label, please input that number.
Select the calibration solutions you will use for the calibration. Choose up to four solutions for a multipoint calibration of the Levelogger LTC. Ensure the solutions are ready in the calibration beaker or container. Select "Start" to begin the calibration.
Note:
If you know the approximate conductivity range of the water that you will be measuring, best accuracy when calibrating your unit is to select two calibration points – one above, and one below that range. If you are measuring in water less than 1,413 µS/cm or above 12,880 µS/cm or 80,000 µS/cm, use just one calibration solution.
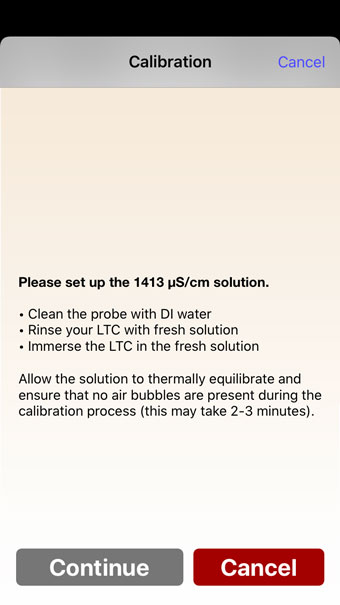
Figure 12-5 Calibration Setup - iOS
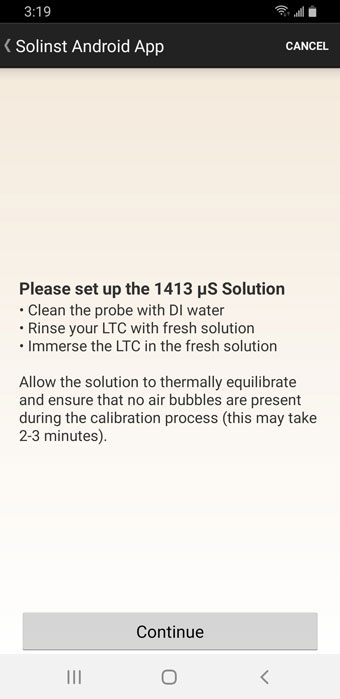
Figure 12-6 Calibration Setup - Android
Use DI water to rinse the LTC Levelogger first and then rinse the LTC Levelogger with the displayed calibration solution. Use fresh solution for calibration, and immerse the LTC Levelogger. Lightly tap the Levelogger to remove any bubbles from the sensor. Allow 2-3 minutes to stabilize, then select "Continue" to calibrate.
Since most standard calibration solutions state conductivity at a standard temperature of 25ºC, the LTC Levelogger an account for temperature differences between 10 to 30ºC when you calibrate the unit. The LTC Levelogger will compare the current temperature and conductivity readings against the temperature corrected standard solution.
When a single-point calibration is successful, the process is complete. Once the calibration is complete for the first solution of a multipoint calibration, a message will appear stating that the calibration was successful. When you select 'Ok', you will be prompted to start the rinsing process for the next solution selected. The calibration process will proceed automatically until completed for all solutions.
If a failure occurs at any point during calibration, a message will appear asking you to clean and check your probe, check your solutions, then start the calibration process over for that current solution by selecting 'Ok'. If performing a multipoint calibration, any previous successful calibration points will remain.
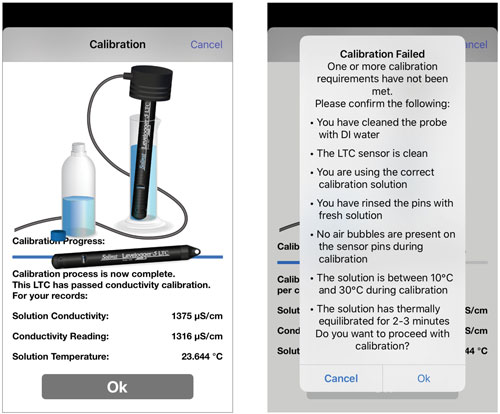
Figure 12-7 Conductivity Calibration Results - iOS
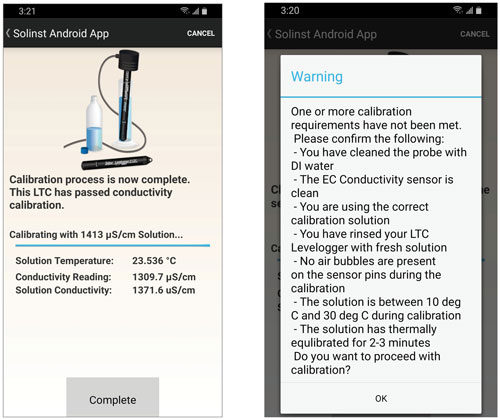
Figure 12-8 Conductivity Calibration Results - Android
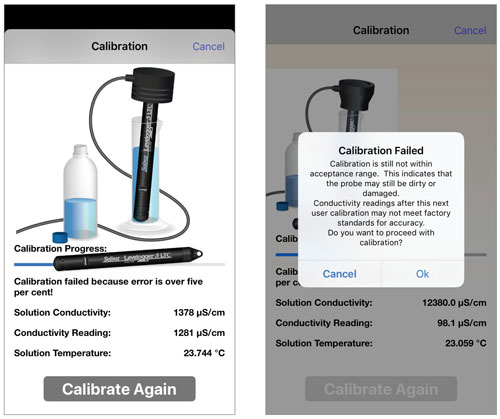
Figure 12-9 Conductivity Calibration Retry - iOS
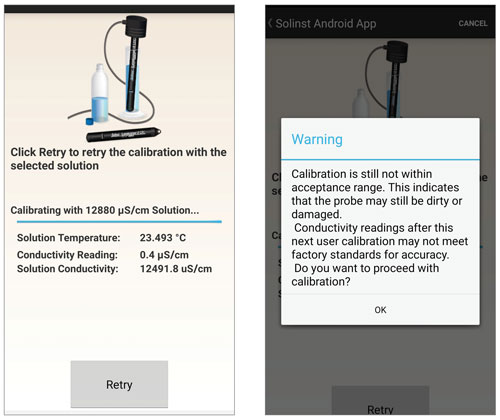
Figure 12-10 Conductivity Calibration Retry - Android
Select "Calibrate Again" or "Retry" to retry the calibration a second time. If a second failure occurs during calibration, a warning message will appear indicating that your probe may still be dirty, or damaged. This may occur if your LTC Levelogger conductivity sensor has been affected by dirt, mineral build-up, etc., so it no longer responds like it did when it was first factory calibrated. This step allows your sensor to be calibrated within a wider range of the standard solution value.
If you select 'Ok' to accept the larger tolerance, the calibration process will start over for that current solution. If performing a multipoint calibration, any previous successful calibration points will still remain. If you select 'Cancel', the LTC Levelogger will default back to the last pre-calibrated state. You can retry the calibration using the normal tolerance range. Select "Calibrate Again" or "Retry" to retry the calibration a third time.
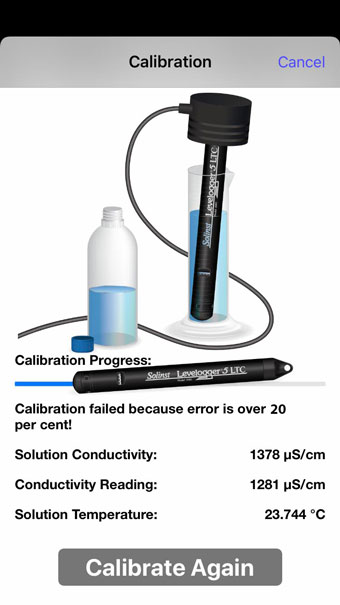
Figure 12-11 Conductivity Calibration Third Try - iOS
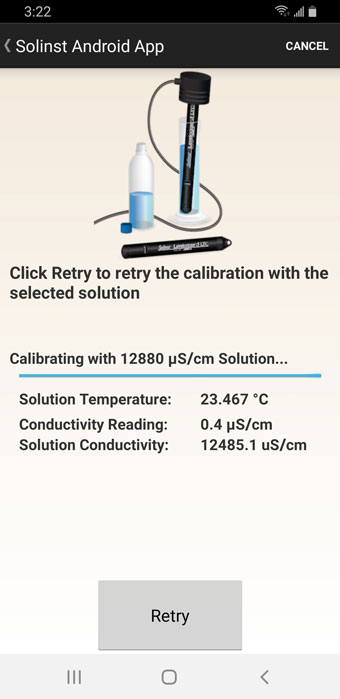
Figure 12-12 Conductivity Calibration Third Try - Android
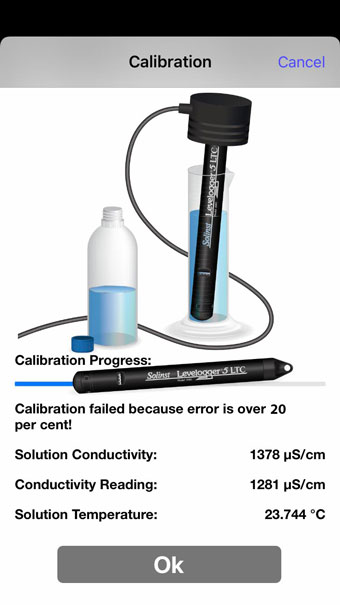
Figure 12-13 Calibration Failure - iOS
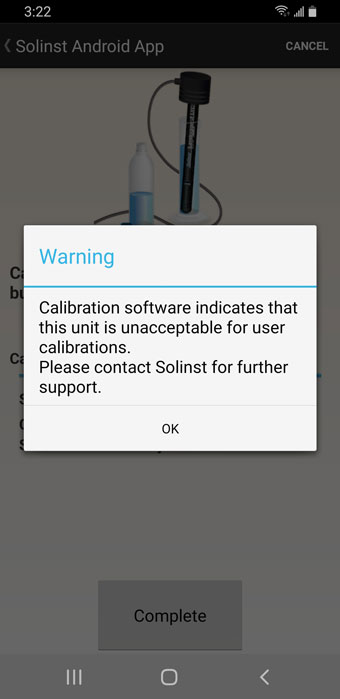
Figure 12-14 Calibration Failure - Android
If a third calibration error occurs, or the results of the calibration are outside the error tolerance range, a warning message will appear stating the calibration failed. It is recommended to contact Solinst for further options. Click "Ok" or "Complete" to exit the Calibration screen.


