Note:
After plugging in the USB device, if the Found New Hardware Wizard does not automatically appear, proceed to the Manual USB Installation instructions in Section 5.1.1.
1) Plug the USB device into the computer, and Windows will automatically detect the connected device. Click ‘Install’ from a list or specific location’, then click the ‘Next’ Button. Start the Hardware Installation Wizard (Figure 5-1).
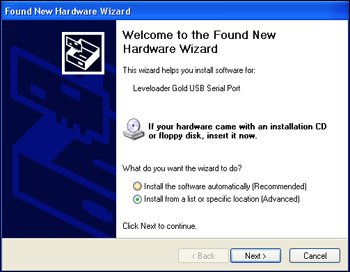
Figure 5-1 Found New Hardware Wizard Window
2) Select the installation option, ‘Include this location in the search’ (Figure 5-2), then click the ‘Browse’ Button to search for the appropriate directory:
C:\Program Files\Solinst\Levelogger4_1\USB Drivers
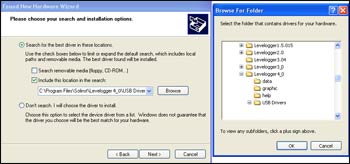
Figure 5-2 Found New Hardware Window and
Figure 5-3 Browse for Folder Window
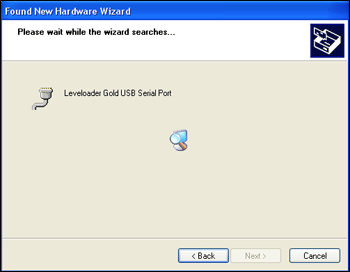
Figure 5-4 Found New Hardware Search Window
3) A warning message will then prompt that the software has not passed the Windows Logo Test. Select ‘Continue Anyway’ (Figure 5-5). This will complete the installation process. A system restart may be required. Repeat the steps if the installation fails the first time.
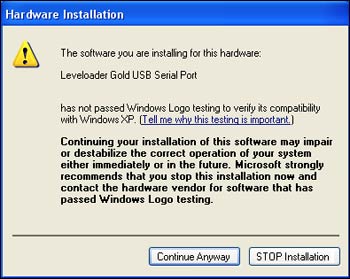
Figure 5-5 Hardware Installation Window
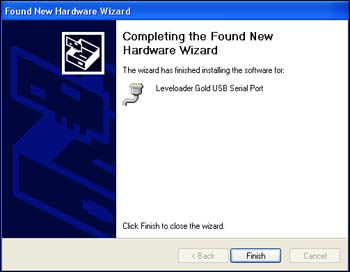
Figure 5-6 Found New Hardware Completed Window

