From the main menu, click Remote LevelSender. Here you will have options to view the LevelSender Settings, View the Project Data Report, add Alarm Notification Recipients, and update the device with LevelSender Changes. See Section 6.1 for viewing the Project Data Report.
5.2.1 LevelSender Settings
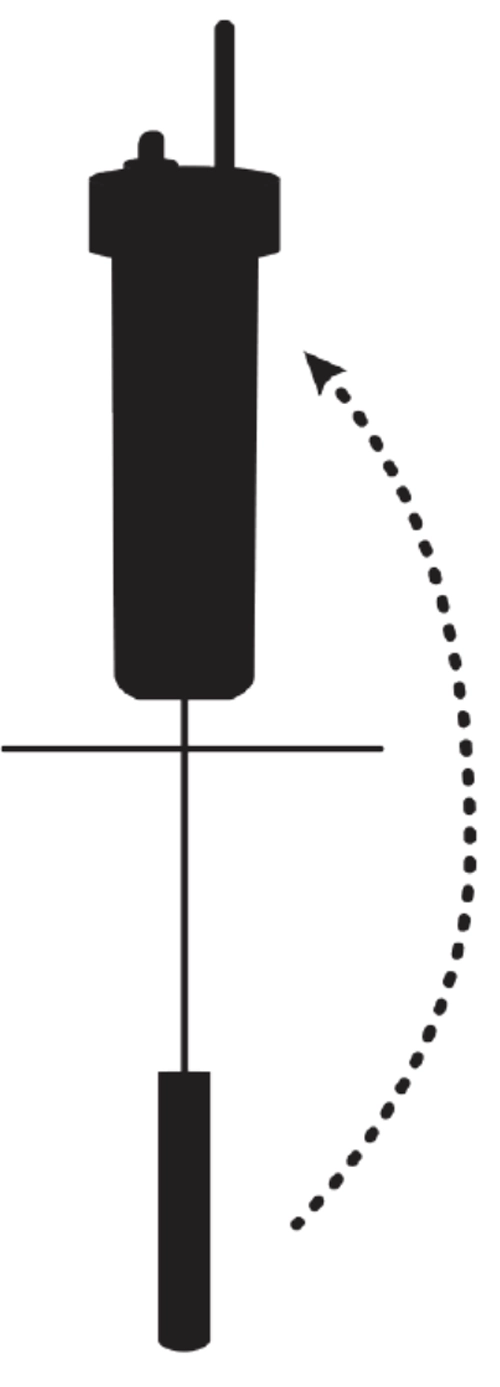
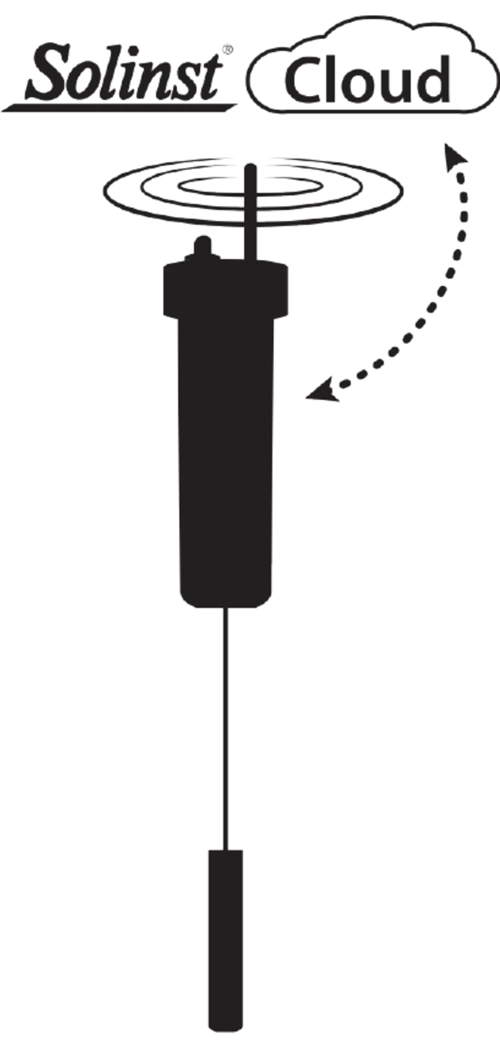
Selecting the serial number or name of a programmed remote (or connected) LevelSender ![]() from the Project List will display the LevelSender Settings, including the last reported time and the next expected report time.
from the Project List will display the LevelSender Settings, including the last reported time and the next expected report time.
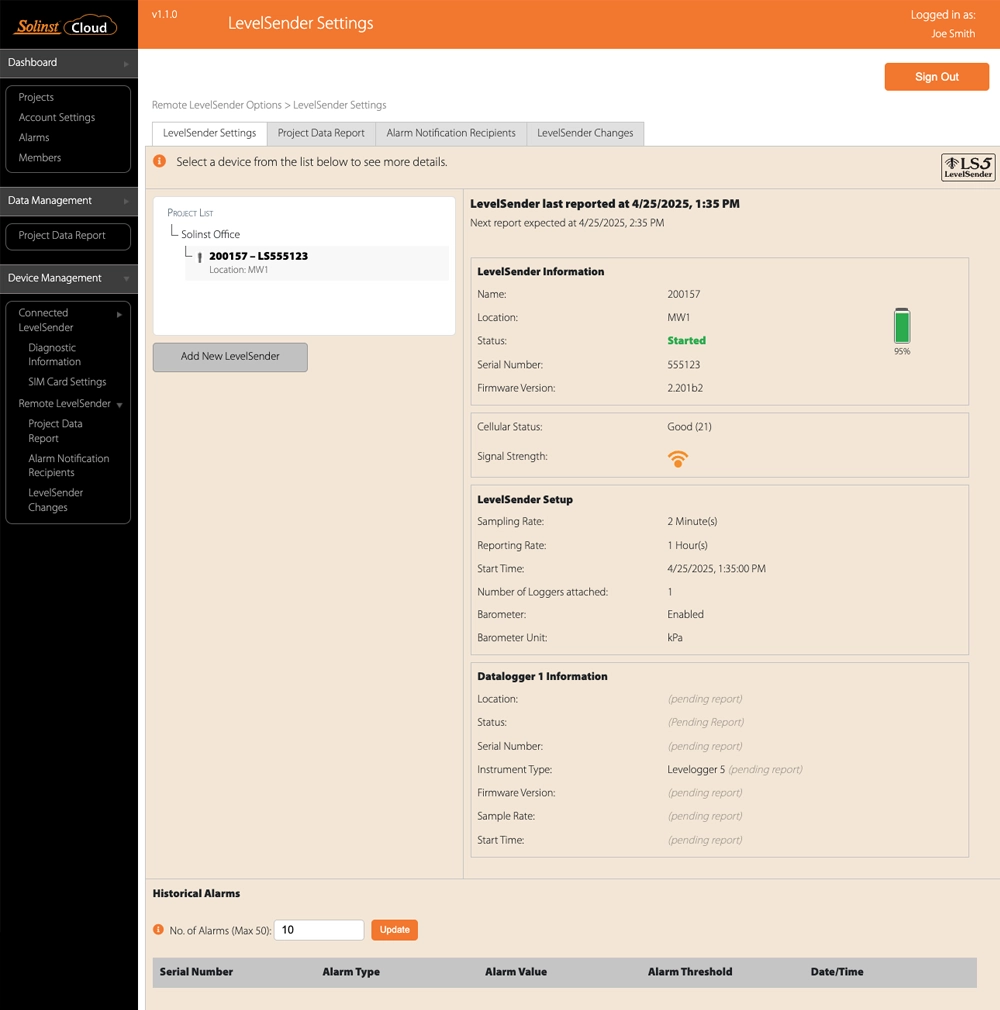
Figure 5-9 Remote LevelSender Settings
LevelSender Information
- Name: the serial number or name given to the LevelSender.
- Location: specific site / location information that you input to identify each LevelSender.
- Status: the LevelSender will either be "Reporting" with a previously programmed data collection schedule, "Stopped", or "Waiting to Start" at a programmed future start time.
Note:
The status will update after the first report. Before that, the status will be "Waiting to Start".
- Serial Number: the serial number of the LevelSender.
- Firmware Version:the firmware version of the LevelSender station will be displayed.
- LevelSender Battery: the percentage of battery level remaining in the LevelSender will be displayed.
- Cellular Status: the status of the cellular connection will displayed.
- Signal Strength: the signal strength of the LevelSender modem will be displayed.
LevelSender Setup
- Sampling Rate: the rate that the LevelSender station collects data from the connected datalogger(s).
- Reporting Rate: the rate that the LevelSender station reports collected data to the Solinst Cloud.
- Start Time: the date and time the LevelSender started collecting data (or date and time the LevelSender is programmed to start).
- Number of Dataloggers Attached: either one or two dataloggers will be attached.
- Enable Barometer with Unit: if Enabled, indicates that the internal barometer is used to compensate water level readings in the units shown
Datalogger Information
This section will display the information about the connected dataloggers, including location, status, serial number, type, firmware version, sampling rate and start time.
Historical Alarms
This section will display information about any alarms that have been triggered for the LevelSender. You can also Update the number of historical alarms that are displayed, up to a maximum of 50.
Note:
You can Add a New LevelSender to the same project in this window.
5.2.2 Alarm Notification Recipients
In addition to Account and Project Managers, you can add Alarm Notification Recipients that will receive an email alert when an alarm condition has been met.
To add an alarm notification recipient, enter the Email Address and Display Name of the recipient, then click Add. You can also Remove recipients from the list. Click Save Changes when you are finished adding or removing recipients.
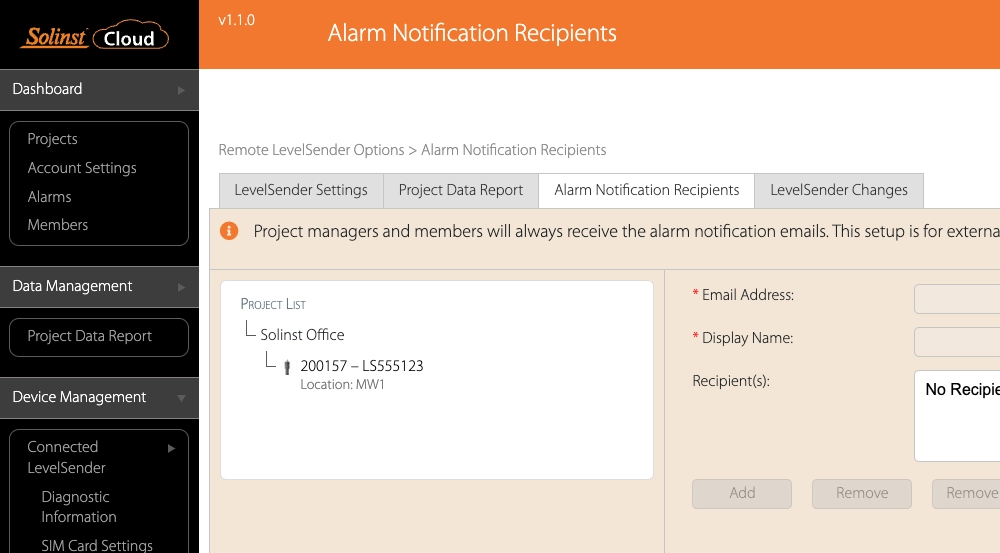
Figure 5-10 Alarm Notification Recipients
5.2.3 Remote LevelSender Changes
To make changes to a remote LevelSender, click LevelSender Changes, then select the device from the Project List.
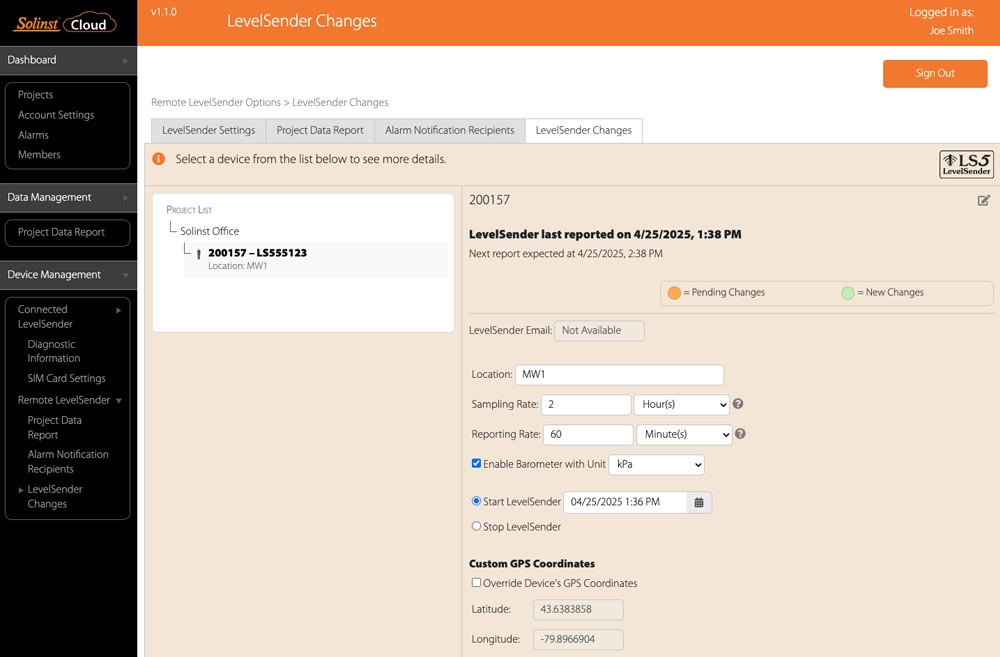
Figure 5-11 LevelSender Changes
You can change the name of the LevelSender device by using the edit icon at the top right of the screen.
The time and date that the LevelSender settings were last updated will be displayed, along with the next expected report time.
If there are changes pending, or new changes applied, this will be indicated by either a yellow or green highlight, respectively.
The unique email that you may have set to be associated with the LevelSender will appear in the LevelSender Email field. This will only be set if you previously programmed the LevelSender using LevelSender Software (see the LevelSender 5 User Guide).
From here, you can edit the LevelSender Setup, including Location, Sampling Rate, Reporting Rate, and Enable the Barometer with Unit. You can set a new Start time for the LevelSender, or Stop a LevelSender from sampling/reporting.
Note:
If you Stop a LevelSender, it will stop sampling/reporting, but will continue to check for remote updates (e.g. a new start time) at the set reporting rate. It will use a small amount of battery and data during these checks.
Note:
To stop your LevelSender from reporting and checking for updates, it must be done with the LevelSender directly connected to the computer using the USB cable and the Diagnostics Information option (See Section 7.1), or the Solinst Cloud LevelSender Field Utility (see section 8.0).
Note:
Any changes made in this tab will not be applied to the remote LevelSender until after its next report (they will not occur right away). You should know your LevelSender schedule so you can apply changes at an appropriate time.
You can override the default location coordinates of the LevelSender by adding Custom GPS Coordinates. Check to Override the Device's GPS Coordinates and enter the Longitude and Latitude values.
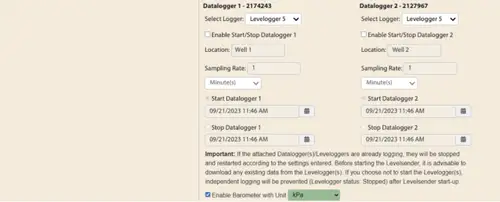
Figure 5-12 LevelSender Changes - Datalogger Setup
You can update or set the connected dataloggers to record independently in their own internal memory.
- Select Logger Type: select the type of datalogger connected, e.g. Levelogger 5, Barologger 5, etc.
Note:
See the Levelogger and Vented Dataloggers User Guides for more information on each datalogger type, and their logging capabilities.
Check the box to enable updates to the datalogger. You can program the following for each connected datalogger:
- Location: specific site / location information that you input to identify each datalogger.
- Sample Rate: the rate at which the datalogger records in its internal memory. Sampling rate depends on the type of datalogger connected.
- Start Datalogger: set a date and time for the datalogger to start recording, or select to Stop the datalogger from recording if it is already logging.
Note:
When using a Splitter, the number 1 or 2 will identify the Dataloggers in Solinst Cloud. The numbers are labeled directly on the Splitter.
There is also the option to update or add alarm settings for the connected dataloggers (see Section 5.1.3).
Once you have finished editing the LevelSender settings, click Save.
These changes will be applied to the remote LevelSender at its next scheduled report interval.
5.2.4 Remote Firmware Updates
If there is a firmware update available for a LevelSender, a warning will appear beside it in the Devices list in Project View.
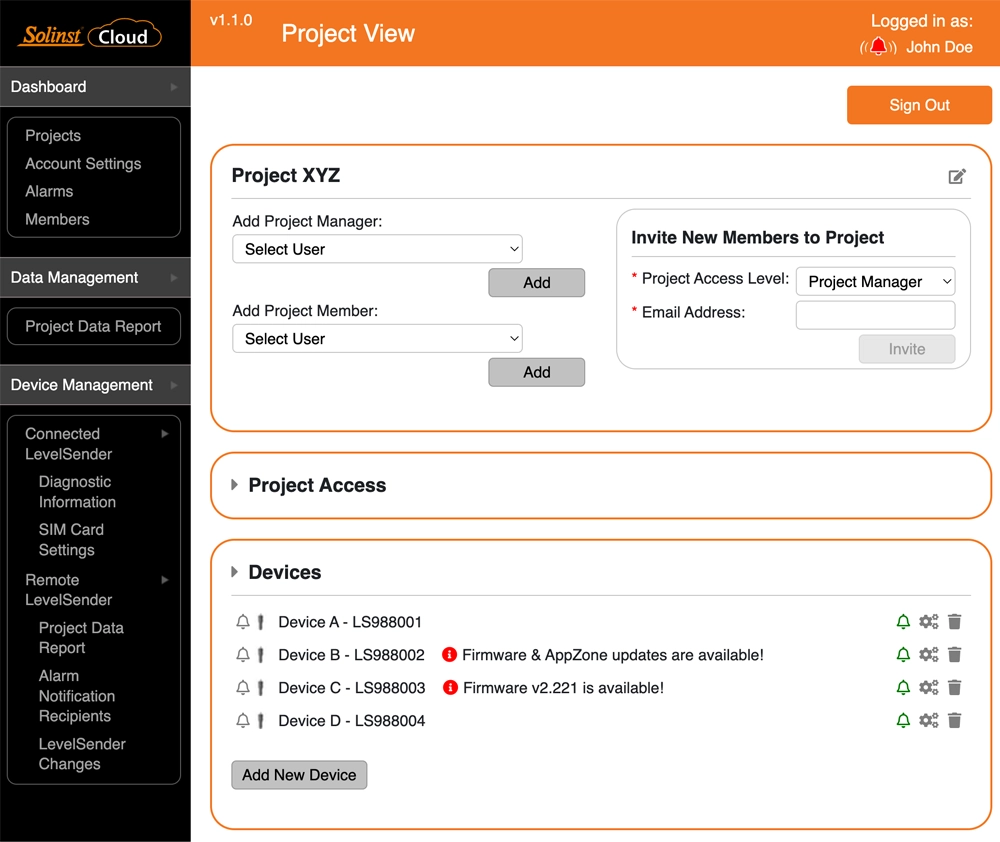
Figure 5-13 Firmware Update Warning in Project View
To begin a firmware update, hover over the warning message, then click to open the LevelSender Changes tab.
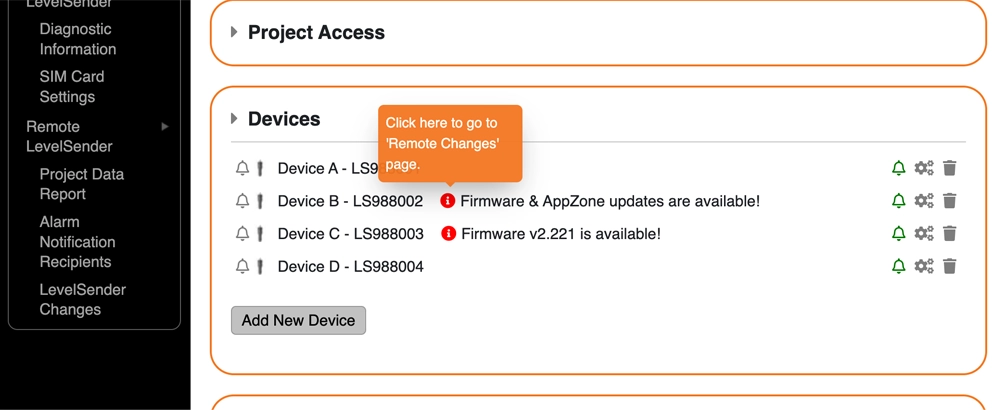
Figure 5-14 Firmware Update Warning Hover Message
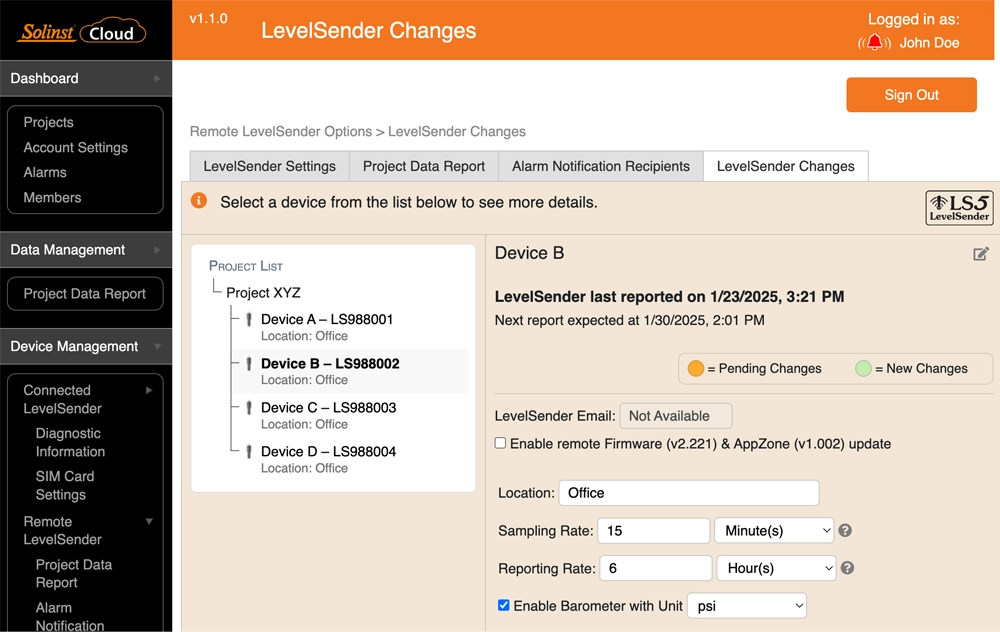
Figure 5-15 LevelSender Changes – Enable Remote Firmware Update
Check to enable the remote firmware update. While the update is pending the text will be highlighted in yellow. The firmware update will be applied to the remote LevelSender at its next scheduled report interval, as with other remote changes.

Figure 5-16 LevelSender Changes – Remote Firmware Update Pending
The pending changes can also be seen in the LevelSender Settings tab.
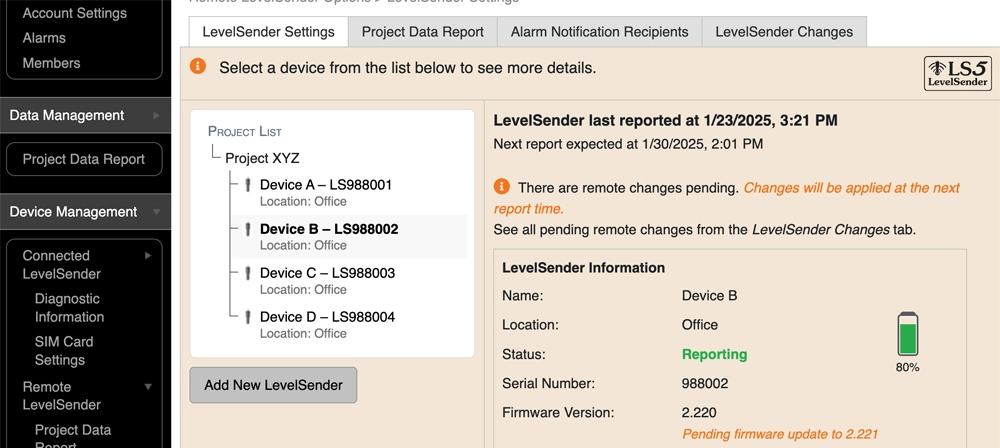
Figure 5-17 LevelSender Settings – Remote Firmware Update Pending


