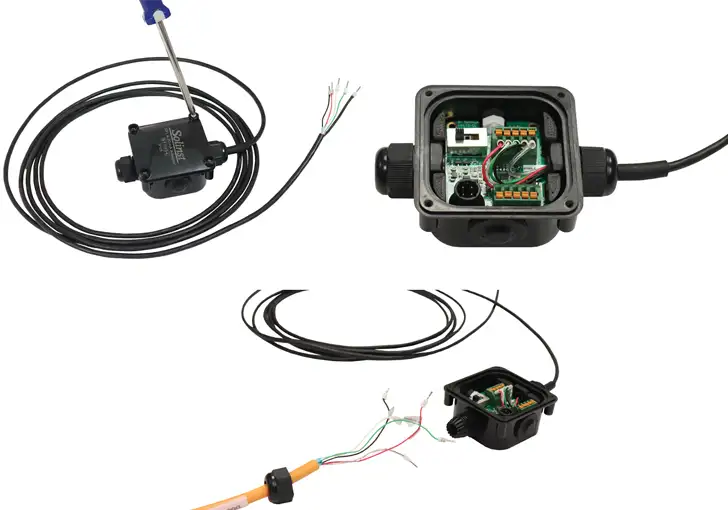
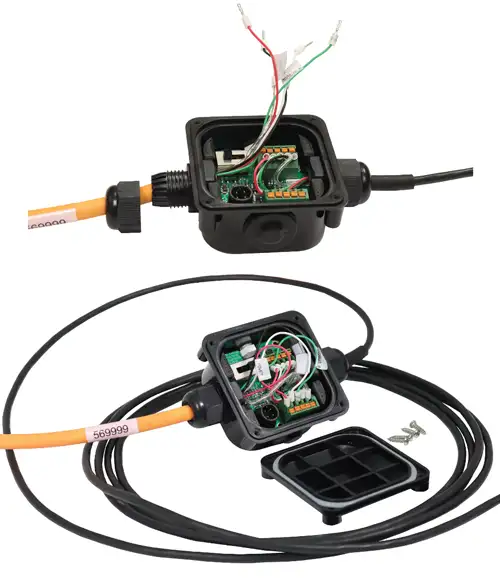
To connect the WLTS to the Current Loop Adaptor, it must first be connected to the Communication/Vented Cable (see Section 1.4.1), then the Communication/Vented Cable is connected to the WLTS Current Loop Adaptor.
- To connect the Cable to the Adaptor, first, unscrew and remove the compression fitting nut from the Adaptor.
- Use a Phillips screwdriver to remove the four screws and remove the cover of the Adaptor.
- Thread the wire leads (and vent tube for vented versions) of the Cable through the compression fitting nut, then thread them through the opening in the Adaptor.
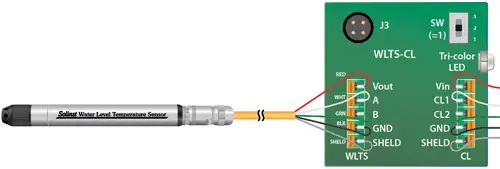
- Attach the wire leads to the push connect fittings of the WLTS terminals on the circuit board of the Adaptor. See the wiring diagram for the correct wire connections.
- Pull the Cable so the start of the orange jacketed portion is in the opening in the Adaptor.
- Slide the compression fitting nut up the Cable and tighten it back onto the Adaptor and Cable.
- Use the four screws to reconnect the cover of the Adaptor.
Note:
In order to fit all of the wiring inside the WLTS Current Loop Adaptor, you may need to put the vent tube underneath the circuit board.
Note:
If configuring the WLTS, then the cover can be left off for access to the USB-A Programming Cable connector.


Figure 1-5 Connecting to the WLTS Current Loop Adaptor

Figure 1-6 WLTS Wiring Connection to WLTS Current Loop Adaptor


