Model 101 Water Level Meter: Electronics Replacement
Tools and Materials Needed
- 101 Power Reel Water Level Meter Electronics Assembly (Spare) (#110547)
- Wire Cutters
- Phillips Screwdriver
- 1/8" Allen Key
- 3/8" Hex or Socket Wrench
- Flat Screwdriver
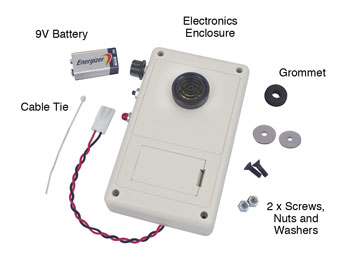
101 Power Reel Water Level Meter Electronics Assembly
Instructions
- Disconnect the Power Reel from the power source, and remove the battery from the Water Level Meter electronics enclosure.
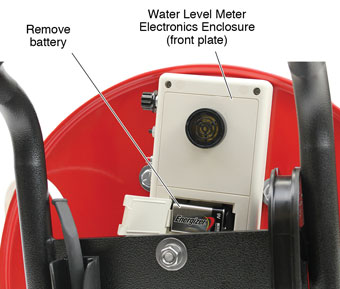
- Unwind the entire tape from the reel.
- Unplug the Molex connector that connects the tape to the Water Level Meter electronics.
- Cut the Molex connector off the wires of the old Water Level Meter electronics (Molex connector will not fit through the grommet).
- Use the Phillips screwdriver to remove the four screws from the corners of the front plate of the electronics enclosure, and remove it from the reel.
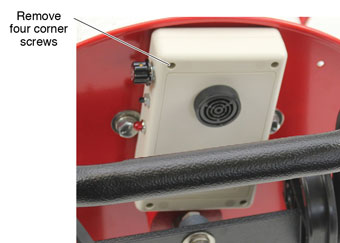
- Remove the two screws holding the back plate of the enclosure to the reel. Stabilize the nuts with the socket or hex wrench, while using the Allen key to undo the screws.
- If required, push out to remove the grommet from the reel and back plate. A new grommet is provided with the replacement assembly.
- Insert the new grommet into the hole in the back plate of the enclosure (some enclosures may come with the grommet already installed). Use the flat screwdriver to help get the grommet in place.
- Use the Phillips screwdriver to remove the four screws from the corners of the new electronics enclosure to separate the front plate from the back plate.
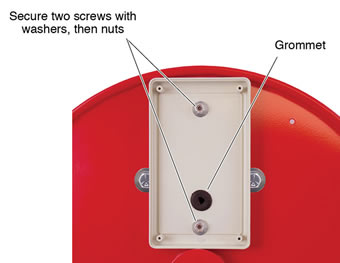
- Mount the back plate of the new electronics enclosure onto the reel, in the same position as the old enclosure (hole in the grommet lines up with the hole in the reel). Use the two new screws from the inside of the reel, with washers then the nuts on the inside of the back plate to secure it to the reel.
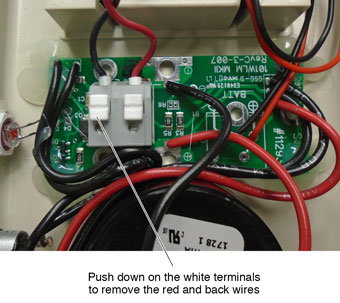
- From the new Water Level Meter electronics, press down on the white terminals to remove the red and black wires (with Molex connector) from the assembly.
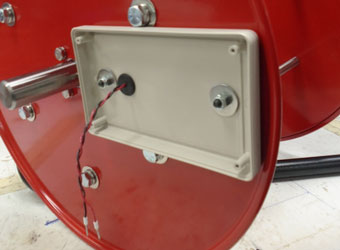
- Insert the wires removed from the electronics, through the hole in the reel and the grommet in the back plate.
- Reconnect the wires removed from the electronics, by inserting into the two terminals. The red wire is inserted into the terminal with the white square below it on the circuit board.
- Use the four new screws to secure the front plate to the back plate of the Water Level Meter electronics enclosure.
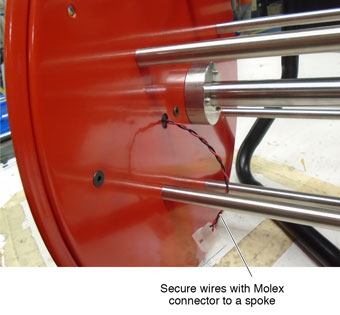
- Use the cable tie to secure the wires with the Molex connector to one of the spokes in the reel.
- Connect the new electronics Molex connector to the Molex connector on the tape.
- Install the new 9V battery.
- Before winding the tape back onto the reel, test the Water Level Meter electronics by turning the meter on using the dial, and pressing the black test button. The light and buzzer (Sonalert) should activate. Check the connections if the buzzer and light do not work.
- Wind the tape back onto the reel.


