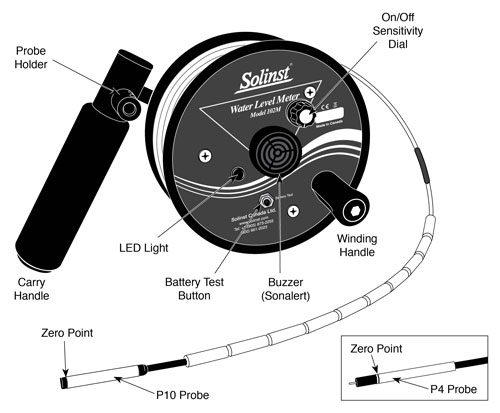
Available Probes: P4 (4 mm diameter - no weights) & P10 (10 mm diameter)
Water Level Measurements
- The zero measurement point on both P4 and P10 Probes is near the tip.
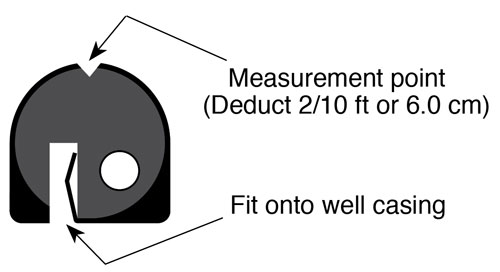
- Feed the cable into the well. If a tape guide is used, lay the cable onto the groove on the top. Measurements will be read at the point of the V-notch on the tape guide. Remember to deduct 2/10 ft or 6.0 cm.
- The light and buzzer activate when the probe tip enters water. To ensure accuracy, lower and raise the probe a few times and then record the depth measurement from the cable at the top of the well.
Tape Guide (Optional)

Equipment Check
- Turn sensitivity dial fully clockwise.
- Clockwise rotation of sensitivity dial turns meter on and increases sensitivity.
- Always set dial to highest sensitivity position, then decrease if necessary.
- Depress the Battery Test button to test the battery and main circuitry.
- Submerse the probe in tap water. This completes the circuit and activates the buzzer and light.
Notes:


