Tools and Materials Needed
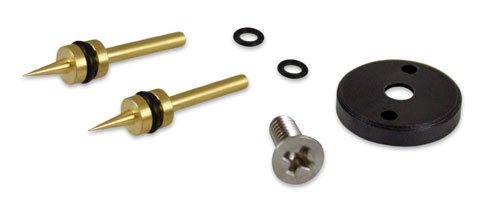
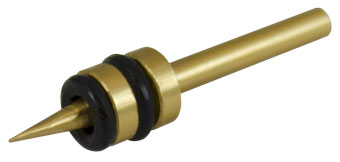
- Laser Tape Seal Plug Brass Tubes Replacement Assembly (#113464) includes:
- 2 x brass tubes (with o-rings installed)
- 2 x o-rings
- Black disk
- Phillips screw
- Phillips screwdriver
- Vice grips (optional)
- Pliers
- Silicone grease
Instructions
- Make sure the Water Level Meter is turned off.
- To remove the probe, twist the probe counter-clockwise and slowly pull it away from the tape seal plug.
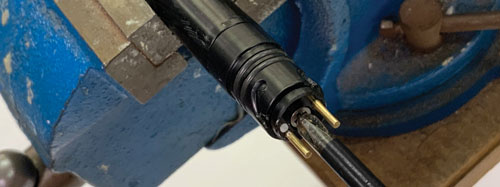
- Remove the two connectors from the brass tubes.
- Remove the screw from the end of the tape seal plug.
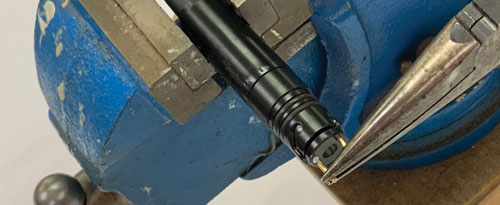
- Use pliers to pull out the two brass tubes and the black disk from the tape seal plug.
- If this is a newer style tape seal plug, remove the two o-rings from the openings.
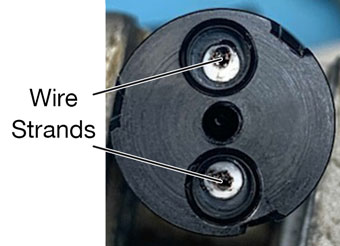
- Make sure the wire strands in the tape conductors are centred to ensure a good electrical connection with the new brass tubes.
- Apply a very thin film of silicone grease on one side of a small o-ring. Remove any excess.
- Install the o-ring over the pointed end of a brass tube. The silicone grease will help hold it in place.
- Push the brass tube (pointed end first) into one of the openings in the tape seal plug. Ensure it is pushed in all the way so that it is flush with the end of the tape seal plug.
- Repeat the process in steps 8-10 to install the second brass tube in the other opening in the tape seal plug.
- Install the black disk over the brass tubes and use the screw to secure it to the tape seal plug.
- To replace the probe, with the tape facing up, connect the green wire to the brass connector on the top of the tape seal plug and the white wire to the bottom brass tube. Ensure the connectors are pushed all the way onto the brass tubes.
- Keeping the wires connected, slowly twist the probe up to two times. This shortens the wires and allows them to tuck easier into the probe body, avoiding any nicks.
- Line up the indents in the probe with the grooves in the tape seal plug. Push the probe past the o-ring, then twist the probe clockwise until the probe seats on the tape seal plug.
- Test that the Meter is working correctly (see operating instructions, if required). Check the connections if the Meter does not work as expected.
Note:
It will take some force to pull past the o-ring on the tape seal plug. Ensure not to overextend the wire connectors inside the probe.
Note:
If using vise grips, do not over-tighten, as this could damage the tape seal plug.

Note:
See the Probe Replacement Instructions for more details; including cleaning, inspecting and replacing the two o-rings on the tape seal plug body, if needed.


