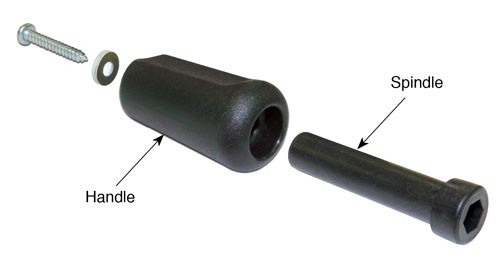
Tools and Materials Needed
- Handle Assembly (#103563)
- Phillips or Robertson Screwdriver
- Needle Nose Pliers

Handle Assembly (#103563)
Instructions
- Place the reel on a flat surface, with the faceplate up. Use the Phillips or Robertson screwdriver to undo the three screws holding the faceplate to the hub. Remove the faceplate.
- For Meters with a Molex connection, disconnect the connector that attaches the faceplate electronics to the tape. For Meters with tape leads connected directly to the circuit board, press down on the push-release fittings and pull to remove the tape leads. Remember which lead is removed from each terminal – this is important when reconnecting.
- Use the needle nose pliers to stabilize the spindle, while using the screwdriver to remove the screw holding the handle to the faceplate. Remove the old handle assembly.
- Take the new handle assembly, insert the spindle into the top of the handle, and center the spindle over the hole in the front of the faceplate.
- Slide the washer over the screw and use the screw to secure the new handle from the back of the faceplate, while stabilizing the spindle with the pliers.
- Reconnect the Molex connector from the faceplate to the tape or, push down on the white terminals on the circuit board, insert the leads, then release the terminals.
- Reconnect the faceplate.


