Decontamination Suggestions
- Disassembling your Model 408M Micro Double Valve Pump is not recommended.
- Following your usual cleaning protocols, we suggest washing the exterior of the pump assembly with a suitable cleaning solution (ie. soap, mild solvent).
- The pump’s interior can be cleaned by flushing or pushing your cleaning solution up and through the pump’s intake. You have a couple of options to achieve interior flushing.
- With the filter unscrewed and off the pump’s intake, push a clean piece of 5/8" X 3/8" silicon (or equivalent) tubing over the 3/8" OD SS pump intake. Alternatively, you can use a 1/4" push fitting (1/4" X 10-32 UNF) which can
be directly threaded into the pump’s intake. Then push a suitable length of 1/4" tubing into this fitting. With either option, connect the other end of the tubing to a peristaltic pump and push your cleaning solution through the pump’s interior.

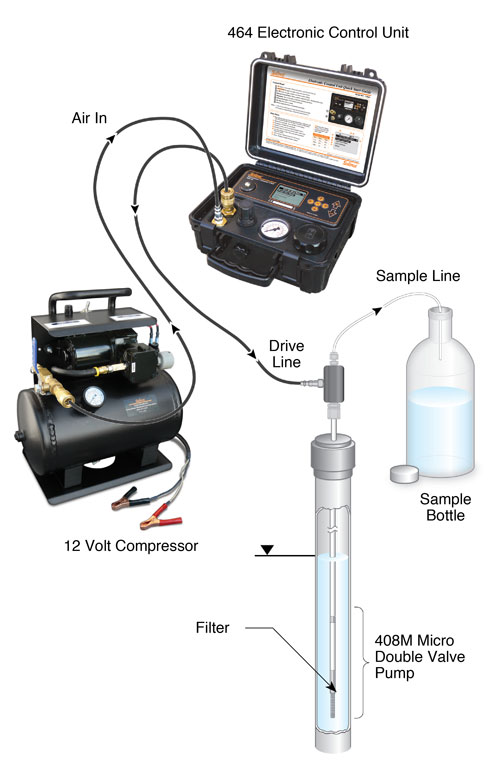
Typical 408M Micro Double Valve Pump Sampling Setup
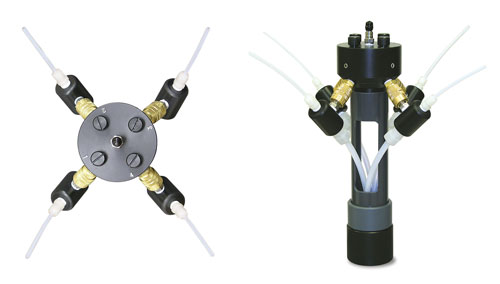
Optional Multi-Purge Manifold Assembly
To purge and sample up to 4 Micro Double Valve Pumps, at a single location, a Multi-Purge Manifold Assembly is available.
- Mount the Multi-Purge Manifold over the well installation, after obtaining water level measurements.
- Thread the pumps down through the collar opening in the Multi-Purge Manifold below the head assembly.
- Connect each individual pump manifold to the appropriately numbered Multi-Purge Manifold connection by pushing the male LL10 connector (on the pump manifold) into the brass quick connect fitting (on the assembly) while pulling back the brass sleeve on the fitting.
- Connect the compressed gas source/controller to the Multi-Purge connection at the top of the head assembly, using the same method as describe in step 3.
- Open and adjust valves on the head assembly of the Multi-Purge Manifold for those pumps that require purging/sampling. Operate control box according to the instructions provided.

Top and Side View of Multi-Purge Manifold with 4 Pumps Connected.


